
12 Winter Home Maintenance Tasks to Finish Before the Cold Hits
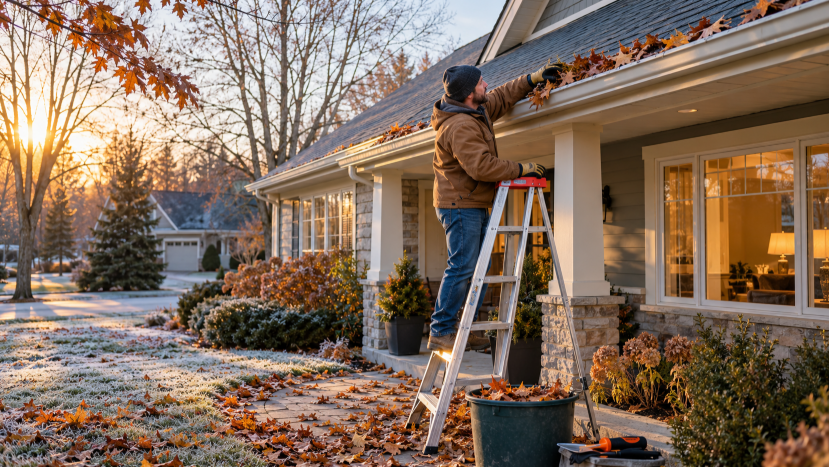
Winter has a way of showing you every small problem your home has been hiding. A draft you never noticed becomes a chilly corner of the living room. A hose left on an outdoor faucet becomes a burst pipe. A fireplace you haven't used since last February becomes a safety question the first time you light it. Most of these problems are cheap and quick to prevent, but only if you deal with them before the first hard freeze.
The stakes are not just comfort. Heating and cooling are the biggest energy use in most homes, and the EIA estimates they account for roughly half of annual home energy consumption, so small leaks and neglected equipment show up on your bill. Safety matters even more. According to the U.S. Consumer Product Safety Commission (CPSC), portable heaters were involved in about 1,600 fires and 70 deaths a year between 2019 and 2021, and fireplaces and chimneys in about 15,400 fires and 20 deaths a year over the same period, as reported in its winter safety release.
This checklist has 12 tasks, ordered so the most important ones come first: safety, then plumbing, then the comfort and energy-saving jobs. Most take less than an hour, and you can spread them over two or three weekends. A few call for a licensed professional, and I've marked those. If you live in a mild climate, you can skip the pipe-freezing items and focus on safety and drafts.
1. Test your smoke and carbon monoxide alarms
This is the single most important task on the list, and it takes five minutes. Carbon monoxide (CO) is invisible and odorless, so an alarm is the only way you'll know it's there. The risk goes up in winter, when windows stay shut and furnaces, water heaters and fireplaces run for hours. The CPSC says CO poisoning can result from improper installation, poor maintenance, blocked venting or misuse of fuel-burning equipment.
The CPSC recommends CO alarms on every level of the home and outside sleeping areas, with smoke alarms inside each bedroom. It also advises battery-operated alarms or ones with battery backup, which matters because winter storms often knock out power.
What to do:
- Press the test button on every alarm and listen for the full sound.
- Replace batteries at least once a year, or choose alarms with sealed 10-year batteries.
- Test alarms monthly through the winter.
- Consider interconnected alarms, so that when one sounds, they all do. That is a big advantage in a larger or two-story home.
- Check the manufacturer's replacement date printed on each alarm, and replace any that are past it.
- Add alarms where you're missing them, especially outside bedrooms.
Pro tip: Tie the battery change to a date you won't forget, like the day you set your clocks back, so it becomes a habit.
2. Have fuel-burning equipment inspected
Your furnace may be fine on the first cold night and fail on the coldest. The CPSC advises having a professional inspect every fuel-burning system each year: furnaces, boilers, fireplaces, wood stoves, water heaters, chimneys, flues and vents. A technician checks that the equipment burns properly and that exhaust is vented outside rather than leaking into the house, which is where CO problems start.
Book early. Heating companies get busy at the first cold snap, and an appointment in October is far easier to get than one in January with no heat. This is a job for a licensed HVAC technician, not a do-it-yourself project.
What to do:
- Schedule a furnace or boiler tune-up and ask the technician to check venting and CO levels.
- If you use portable space heaters, keep them at least three feet from drapes, furniture and bedding.
- Plug electric heaters directly into a wall outlet, never into an extension cord or power strip.
- Never leave a portable heater running while you sleep, and let fuel-burning heaters cool before refueling.
- If you own a portable generator for outages, run it outdoors only, at least 20 feet from the home with the exhaust pointed away. Never run it in a garage, basement or shed.
3. Clean and inspect the chimney and fireplace
If you burn wood, this one is not optional. Chubb, an insurance company, advises having fireplaces, chimneys and oil-fired heating equipment inspected, cleaned and maintained at least once a year. The reason is creosote, a flammable residue that builds up when smoke condenses on the cooler walls of the chimney. If the flue gets hot enough, creosote can ignite and cause a chimney fire.
The same article, citing the National Fire Protection Association (NFPA), says faulty heating systems are the second leading cause of residential fires in December, January and February, and that failure to clean heating equipment and chimneys was the leading factor in home heating fires, at about 28%.
What to do:
- Hire a chimney professional for the inspection and sweep before your first fire.
- Burn seasoned hardwood. Softwood and unseasoned wood create more buildup.
- Make sure the top of the chimney has a spark arrestor, a screen that keeps hot embers from landing on the roof or debris.
- Always use a protective screen in front of a wood-burning fireplace to catch stray embers.
- If you have a wood stove, keep it at least 36 inches from combustible materials unless it has a heat shield.
- Gas log systems need regular cleaning too, to remove deposits and keep combustion proper.
4. Replace the furnace filter
A dirty filter restricts airflow, which makes your system work harder, and winter is when it runs the most. Weatherization guidance from the Bonneville Power Administration says to replace the filter on the manufacturer's schedule, and notes that a new filter helps the system run more efficiently.
It is one of the cheapest and fastest jobs on the list. The filter size is usually printed on its frame, so you can buy the right one in seconds. Buying two or three at once means the next change takes no planning at all.
What to do:
- Check your furnace manual for the filter size and the replacement interval.
- Slide in the new filter with the airflow arrow pointing toward the furnace.
- Write the date on the filter's frame, and set a reminder for the next change.
- Take a quick look at the filter once a month during heavy use. If it's gray and clogged, change it early.
- If you have ductless heat pumps, clean their filters too. They also need regular cleaning.
5. Stop drafts at doors and windows
Gaps around doors and windows let warm air out and cold air in, so your heating runs longer to make up the difference. These gaps are also easy to fix. The BPA suggests installing door sweeps on the bottoms of exterior doors, which block drafts, cold and moisture, and applying insulating film to interior windows as a quick draft barrier. The film is sold at hardware stores and online and goes on with common household tools.
Start by finding the worst offenders. Stand next to each exterior door and window on a cold or windy day and feel for moving air. At night, look for light around a door's edges. Any gap you can see light through is a gap air can pass through.
What to do:
- Add weatherstripping where door frames show gaps or the old strips are cracked or flattened.
- Install a door sweep on each exterior door, including the one between the house and the garage.
- Put insulating film on drafty windows, especially older single-pane ones.
- Keep heavy curtains closed at night. They add an extra layer between you and a cold window.
Pro tip: Do the worst door and the worst window first. You'll feel the difference right away, and it keeps you motivated for the rest of the list.
6. Find and seal hidden air leaks
The biggest leaks are often the ones you can't see: places where plumbing, ducting or wiring pass through walls and floors, and behind outlets and switches on exterior walls. The BPA suggests using a lit incense stick or a smoke pencil to spot them. The smoke drifts toward the draft. Then seal gaps with caulk or spray foam, and add inexpensive gaskets behind outlet and switch plates on exterior walls to stop outside air from coming through.
Sealing leaks matters most when combined with insulation. The EPA says air sealing plus attic and crawl space insulation saves about 15% on heating and cooling on average, as a package of improvements rather than one small repair.
What to do:
- Test on a windy day with the heating off, and hold the smoke near suspect spots. Keep any flame away from curtains and anything flammable.
- Use caulk for small gaps and spray foam for larger ones around pipes and wires.
- Turn off power at the breaker before you remove any outlet or switch cover.
- Install foam gaskets behind outlet and switch covers on exterior walls.
- Check the basement or crawl space ceiling, where pipes and wires often pass through the floor above.
7. Disconnect hoses and protect outdoor faucets
A hose left attached can trap water in the faucet and in the pipe behind it. When that water freezes it expands, and it can split the pipe, often inside the wall where you can't see it until the thaw. A city utility brochure on preventing frozen pipes lists two basic steps: disconnect and store outdoor hoses, and insulate outdoor pipes and faucets.
It's a five-minute job per faucet. It also protects the hoses themselves, which last longer when they aren't left out in a freeze.
What to do:
- Unscrew every garden hose from every outdoor faucet, drain it and store it indoors.
- Cover each outdoor faucet with an insulated faucet cover, which is inexpensive at hardware stores.
- If your home has an indoor shut-off valve for an outdoor faucet, ask a plumber how to close it and drain the line.
- If you have an irrigation system, have it drained following the manufacturer's instructions.
8. Insulate pipes in unheated spaces
Pipes in unheated attics, basements, garages and crawl spaces are the ones most likely to freeze, because nothing keeps those areas warm when the temperature drops. The same brochure advises insulating pipes and faucets in those areas and sealing gaps with caulk where pipes enter the building, so cold air doesn't blow straight onto them.
Foam pipe sleeves are the easiest option. They're cheap, cut to length with scissors and slip over the pipe. Walk the whole house with a flashlight, because the pipes that freeze are rarely the ones you see every day.
What to do:
- Inspect the garage, crawl space, basement and attic for exposed pipes, especially along exterior walls.
- Wrap them with foam pipe insulation and secure the seams with tape.
- Caulk the gaps where pipes pass through exterior walls and rim joists.
- During very cold nights, opening the cabinet doors under sinks on exterior walls lets warm room air reach the pipes. This is commonly recommended.
9. Find and test your main water shut-off valve
If a pipe does burst, every minute counts. A broken pipe can release gallons of water and soak floors, walls and belongings fast, and the first step is to turn off the water. The city brochure recommends locating the master shut-off valve and testing it ahead of time so you can stop the water quickly. It also suggests finding the water meter before snow arrives and keeping it clear, so city crews can reach it in a freeze emergency.
Valves that haven't moved in years can stick or break when you finally need them. Testing now, on a calm day, tells you whether a plumber needs to replace it.
What to do:
- Find the valve, turn it fully off and back on once to confirm it works.
- Put a tag or a piece of tape on it so anyone in the house can spot it.
- Show everyone in the household where it is and how to turn it.
- If you can't find it, or it's stuck, call your water utility or a plumber before there is an emergency.
- Keep a plumber's phone number somewhere easy to find, like the refrigerator door.
10. Check the attic to prevent ice dams
Ice dams happen when heat leaks from the house into the attic and warms the roof. Snow on the upper roof melts, runs down to the cold edge and refreezes into a ridge of ice that traps water behind it. That water can seep under shingles and into ceilings and walls. Iowa State University's AnswerLine explains that this happens when the roof's lower surface stays below 32°F while the upper surface stays above it for a long period.
The fix is to keep the attic cold by stopping the heat from getting there. Its prevention advice: seal the gaps between the living space and the attic, add attic insulation and check the attic's ventilation.
What to do:
- Look for gaps around the attic hatch, recessed lights, ceiling fixtures, chimneys and wiring, and seal them.
- Check that your insulation is even and covers the whole attic floor, with no bare spots or compressed areas.
- Make sure insulation isn't blocking the attic's vents.
- Clear leaves and debris from gutters so melting snow can drain instead of freezing in place.
- If you see water stains on the ceiling or icicles building at the roof edge after snow, ask a roofing or insulation professional to take a look.
11. Wrap your water heater
A tank that isn't well insulated loses heat all day and night, and you pay to reheat the water over and over. It's even more of a problem in a cold garage or basement. The BPA notes that uninsulated tanks, or ones rated below R-24, lose heat and are less efficient, and recommends wrapping the tank with an insulation blanket.
A blanket is an inexpensive project that most people can finish in under an hour. The key is to choose one that fits your tank and to follow the instructions closely, especially for gas units, which have a burner and vent that must stay clear.
What to do:
- Check the label on the tank to see whether it lists an insulation value, and feel the outside of the tank. If it feels warm, it's losing heat.
- Buy a blanket made for your type of heater, and follow its instructions and your water heater's manual carefully.
- For gas units, keep the burner area, the vent and the controls uncovered, as the blanket's instructions specify.
- If the tank is old or leaking, talk to a plumber about replacing it rather than wrapping it.
12. Set a winter comfort routine: thermostat and ceiling fans
Once the house is sealed up, tune how you run it. The U.S. Department of Energy estimates that turning your thermostat back 7 to 10 degrees for 8 hours a day can save up to 10% a year on heating and cooling. That works well while you're asleep or at work, and a basic programmable thermostat can do it automatically.
Ceiling fans can help too. Home Depot's guide says to run them clockwise at low speed in winter, which pushes warm air that has collected near the ceiling back down into the room. Look for the small switch on the fan's motor housing, and check from below that the blades turn clockwise.
One caution if you heat with a heat pump. A large overnight setback can trigger costly backup electric resistance heat, so use smaller temperature changes or a thermostat designed for heat pumps.
What to do:
- Program a lower temperature for sleeping hours and for when nobody is home.
- Don't crank the thermostat higher than your target to heat faster. It won't warm the house any quicker.
- Flip the switch on each ceiling fan so it spins clockwise as seen from below, at low speed.
- Not sure whether a smart thermostat is worth it? Read 8 things to know before you buy one.
The bottom line
If you only have time for a few jobs, do these first: test your alarms, book the furnace and chimney inspections, disconnect your hoses and find your water shut-off valve. They protect your family and your house for very little money. The rest of the list, from sealing drafts to wrapping the water heater, lowers your heating bill and makes the house more comfortable all season.
For more ways to avoid expensive surprises around the house, see 7 home maintenance mistakes that could lead to costly repairs and how to lower your electricity bill with 9 practical steps.
This article is general information. Climate, home type and local codes vary. Hire a licensed professional for work on gas, electrical or heating systems, and follow your equipment's manuals.
Sources
- CPSC: stay warm safely (January 2025)
- Chubb: chimney and fireplace safety tips
- Bonneville Power Administration: cold weather weatherization tips
- City of Everett: preventing frozen pipes brochure
- Iowa State University AnswerLine: ice dams
- The Home Depot: ceiling fan direction in summer and winter
- ConsumerAffairs: are smart thermostats worth the cost? (October 2026)
- Fairfax County: two-degree challenge, citing EIA
Leave a Reply